


DO THIS FIRST! Customize your ticket and bidder sign in/registration landing pages before you create your tickets, so that the landing pages are ready to share with your guests after you create your various ticket types. See our Create Ticket and Bidder Registration Landing Pages help page for more detailed information.
To create a new ticket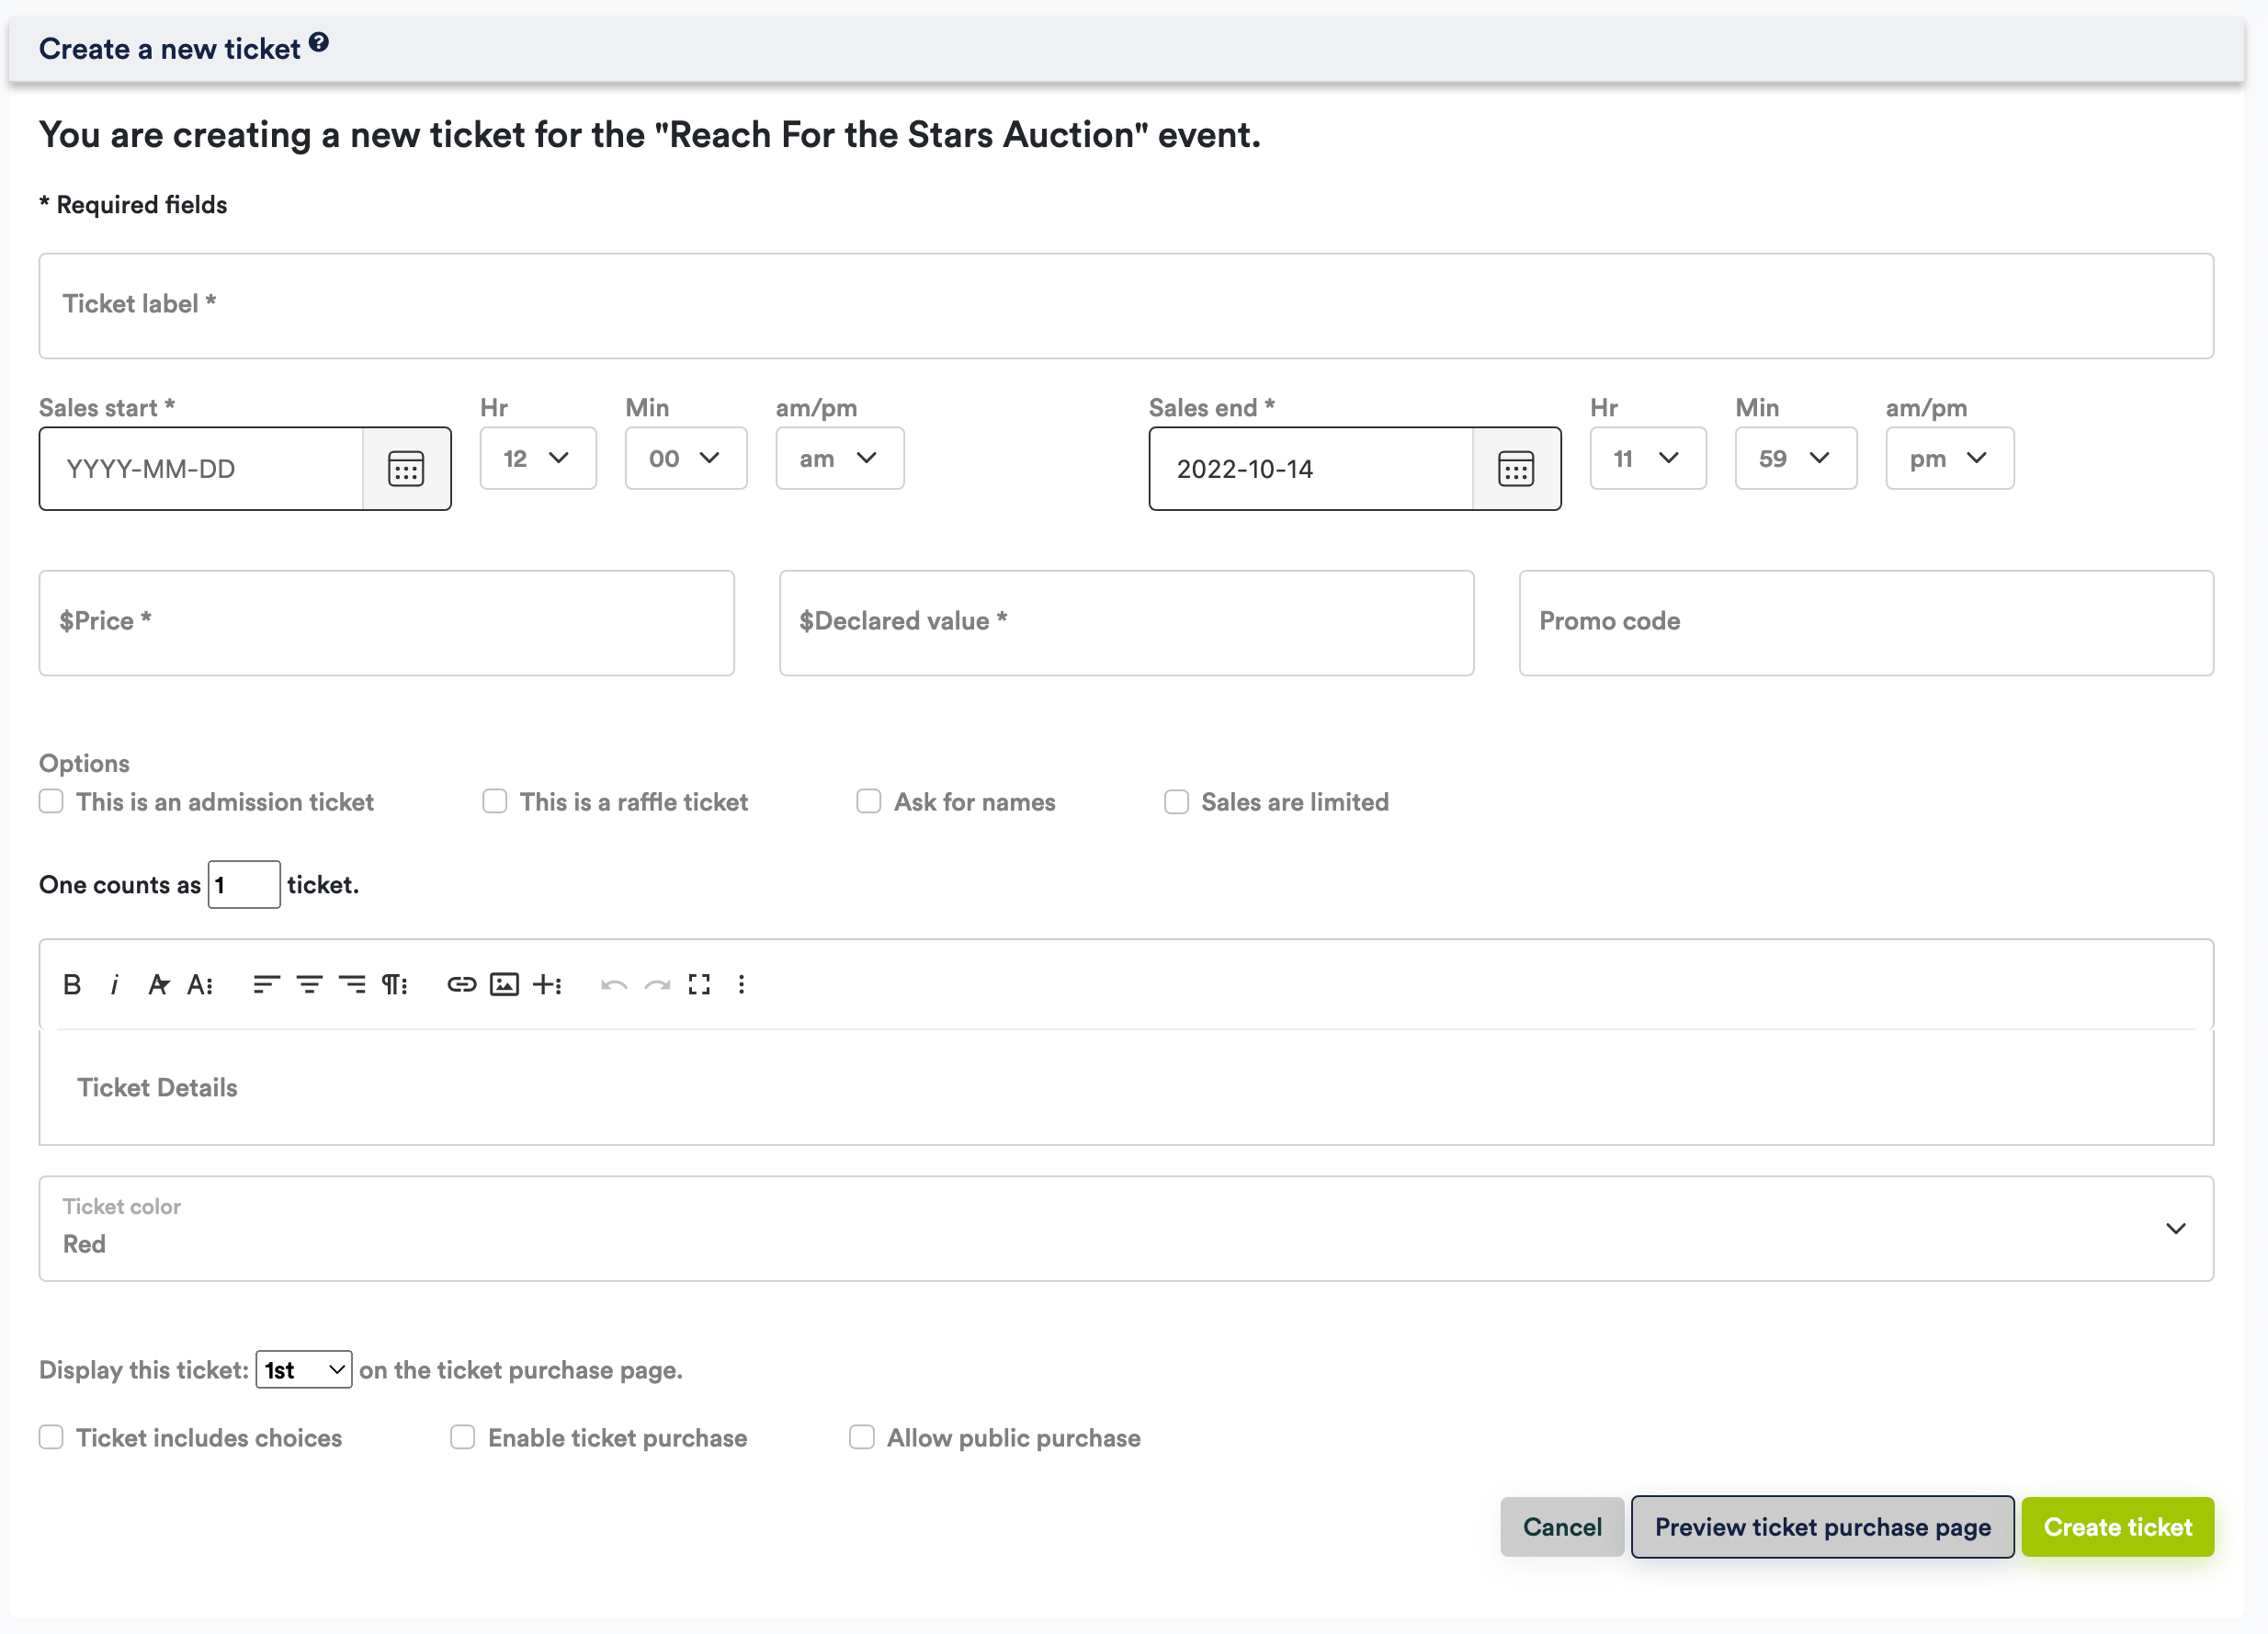
![]() Read the
Create admission tickets QRC for details on create basic and customized admission tickets.
Read the
Create admission tickets QRC for details on create basic and customized admission tickets.
![]() Read the
Include choices for tickets QRC for details on adding choice lists to admission tickets (for example: meal choice or shirt size)
Read the
Include choices for tickets QRC for details on adding choice lists to admission tickets (for example: meal choice or shirt size)
| Ticket Characteristics and Options | ||
|---|---|---|
| Option | Definition and how to use | |
| Ticket label | The name or label of the ticket. Don't include the cost of the ticket in the label. This is redundant and confusing when the ticket type counts as more than one ticket. | |
| Sales start | Day the ticket sales start | |
| Sales end | Day the ticket sales end | |
| Price | Ticket price | |
| Declared Value | The declared value of the ticket. The difference between the declared value and the price may possibly used as a tax deduction by the purchaser. The declared value defaults to the price of the ticket and shows on the final ticket receipt. Please consult your tax advisor if you do not know what to enter as a declared value. | |
| Promo Code | Create a Promo Code to hide this ticket type on the online ticket purchase page, unless the Promo Code is entered by the ticket purchaser. Use this option for special offer/price tickets. | |
| Admission ticket | If this option is set then the contact to whom the ticket is assigned will automatically be marked as a bidder for your event and can be seated using the Table Seating Management feature available to Bidsheet Pro™ and Mobile Pro™ package users. | |
| Raffle ticket | Use this option to indicate a raffle ticket. Your guests/users can select to only show raffle tickets on their ticket page | |
| Ask for names | If this option is set, the system will prompt the ticket purchaser to enter names of their guests when purchasing a multi-seat ticket. Guest names are stored in Silent Auction Pro and are now part of the reconciliation process. If this option is unchecked, all tickets of a multi-seat ticket are assigned to the purchaser. For Ticket Types such as raffle tickets, drink tickets, golf mulligans, etc., leave this value unchecked. | |
| Sales are limited | The number of tickets for any ticket type may be limited. Set this option if you want to limit ticket sales. The Sales are limited option does not limit the number of tickets purchased by a single user. | |
| Ticket multiplier / Counts as | One "ticket" purchase actually purchases multiple tickets. For example: 1 Table of 10 ticket equals 10 tickets purchased for the event. Use the "counts as" value to create sponsorships, tables, couples/family, or raffle multi-pack tickets. Unless you are asking for names for each ticket, leave this value set to 1. For instance, if you are selling raffle ticket packages of 20 tickets, but all 20 tickets will be used by the purchaser, leave the ticket multiplier set to 1 and use the title and description fields to indicate that the person is purchasing 20 tickets. | |
| Ticket Details | The ticket details are presented below the ticket label as shown in the example above. Use the editing menu to format your ticket description. You may insert links and images to enhance your ticket. | |
| Ticket color | Sets the color of the ticket icon. This helps to differentiate between different types of tickets. | |
| Ticket display order | The order in which tickets will be presented on the ticket sales page. Tickets are sorted first by the display order then by the ending sales date. | |
| Ticket includes choices | Set this option if the ticket includes other items you want the buyer to specify such as a meal choice, T-shirt size, etc. | |
| Enable ticket purchase | Enables or disables the ability to purchase this type of ticket. | |
| Allow public purchase | Allows this ticket type to be purchased online by the public. If a ticket type is intended only for admin use, for example a comp ticket that is not for sale to the general public, leave this value unchecked. | |
After creating one or more tickets, you may need to edit an existing ticket, such as the ticket display order, meal selections, or t-shirt sizes. To edit any ticket, navigate to menu and choose the option. Choose the ticket requiring edits from the Choose ticket dropdown box, and click the button. After updating the ticket, you can preview the ticket purchase page to see your changes. You can also edit ticket types when viewing the Tickets Info Report. Click on the ticket type name to open the Edit Ticket Type page.